

Getting started with your Spiio Dashboard
- Home
- Getting started with your Spiio Dashboard
Sign in to your Dashboard
- We have previously sent you a sign-up email
- If you have not signed up yet, please search notify@spiio.com in your inbox
- Please note that this email might be in your spam, but if not, please reach out to us
Download our mobile app
- Use same login credentials as your Spiio Dashboard
- Our mobile app is used on-the-go and is needed for installing your Spiios
- We offer live in-app chat support if you need help
Install your Spiios
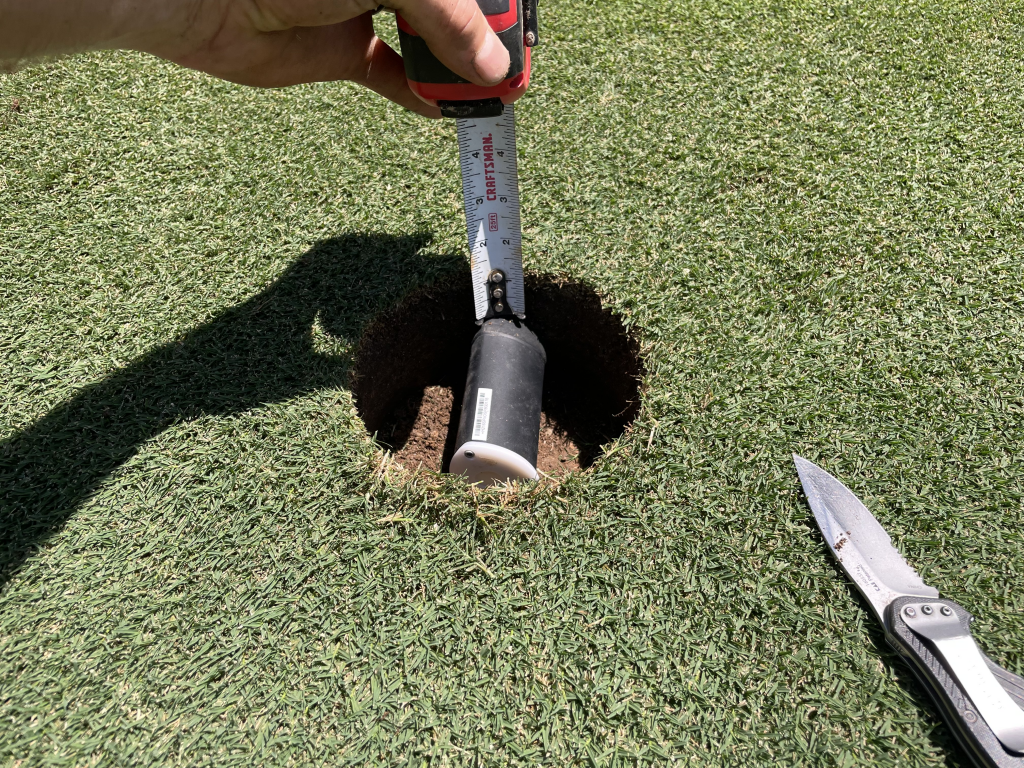
in the same depth
As a first rule of thumb, we always recommend that you install your Spiios in the middle of your rootzone for both greens, tees and fairways.
The Spiio is two inches wide and the soil moisture probe starts about half an inch below the top of the Spiio. Practically, this means that if you want data from, say, a two inch depth, then you need to install your Spiio one inch below the turf thatch.
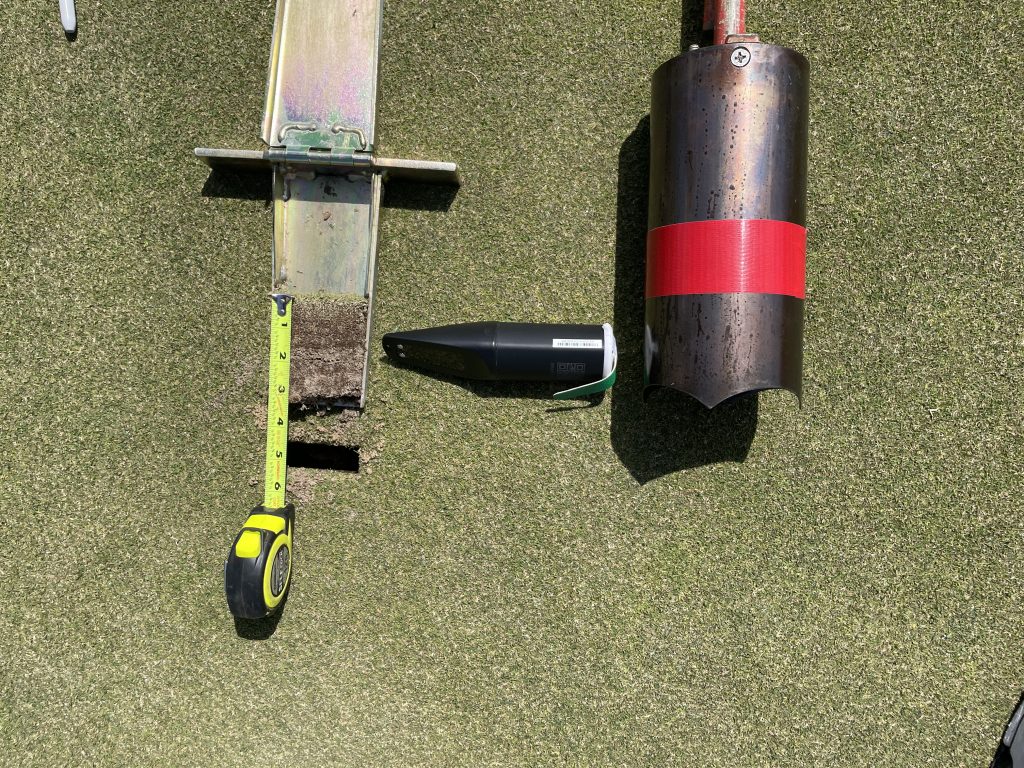
Prepare your
cup cutter
We recommend that you mark your desired depth on your cup cutter with tape for consistency. This is especially important if you are installing multiple Spiios in one day. A consistent depth between your Spiios allow you to better compare data between different areas on your golf course.
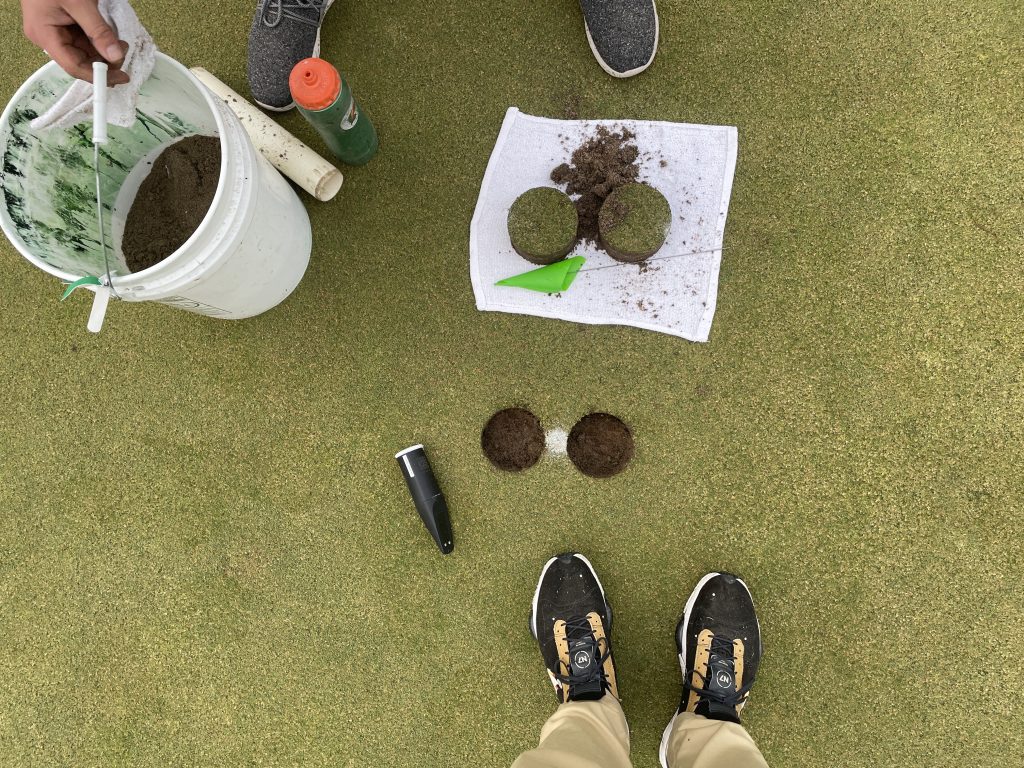
Cut your cups about
one inch apart
Cut two cups approx. one inch apart forming a bridge between the two cups. Using a knife or an ice pick, you can break the bridge of sand under the one inch gap.
Collect the excess sand on a towel or in a bucket for backfilling.
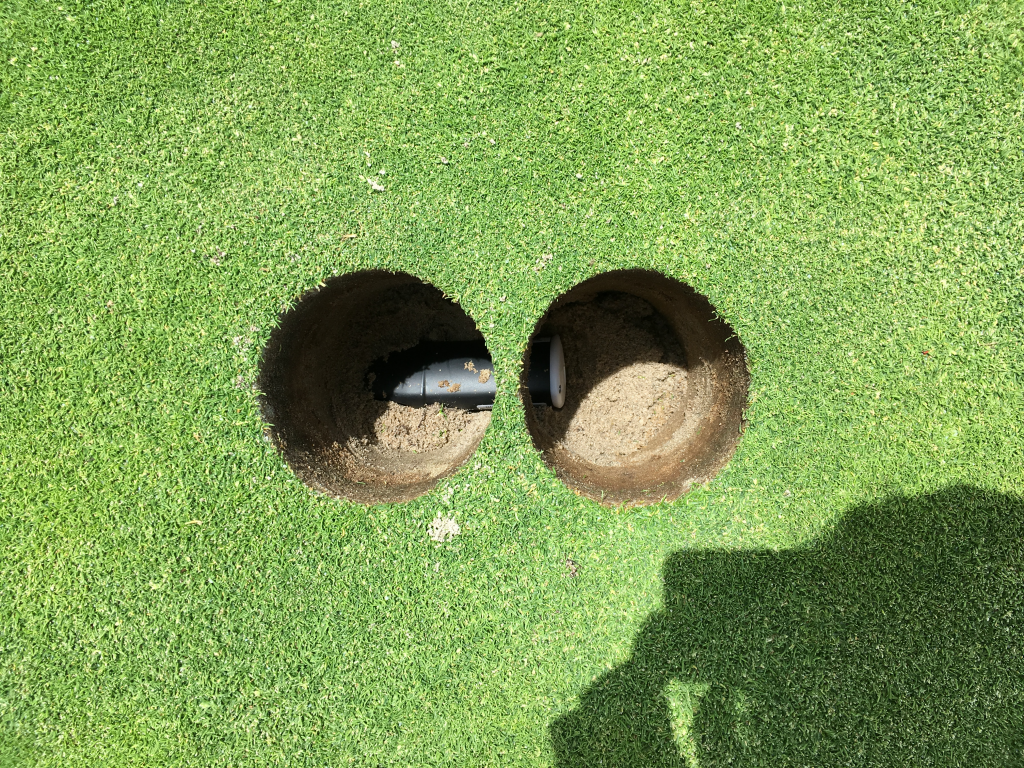
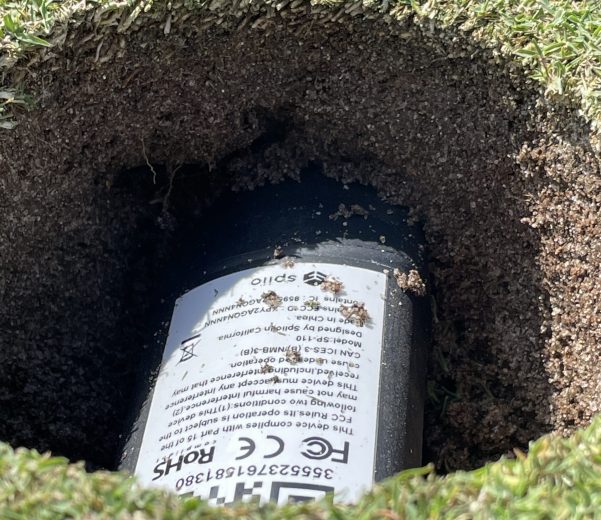
Insert your
Spiio horizontally
Insert you Spiio from right to left as seen in picture. Insert pointy part of the Spiio fully in soil leaving one cup with no Spiio in it for easier backfilling. Make sure soil is compacted around the probe.
Insert you Spiio
firmly and compacted
Correct sensor insertion is the most important thing when it comes to installing your Spiio.
Make sure that the soil are firmly placed up against the faceplate of the sensor (shiny surface with two metal rivets on).
Compact soil around and under the sensor if needed. Wet the area with water as you backfill the plugs.
How to navigate the
Map & List view
How to use your
Heat Map
How to set up
customized thresholds
How to invite users
and set data schedule
How to set up
your profile
Eyes in the ground;
check your soil moisture anywhere
We are always there
if you need help
Find the support chat icon in our app and our team will be ready to assist you.
- Real people, no bots